Friday 31 August 2012

rumball-truffle-cake-pops


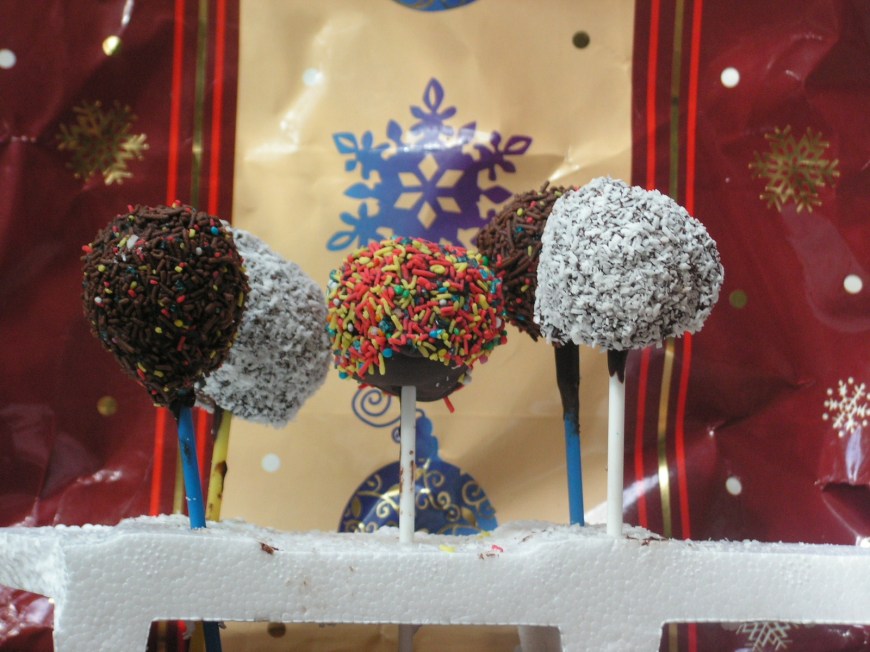
Inspired by two of my favourite blogs, RetroMummy and Bakerella, I embarked on a Cake Pop mission today. I don’t know why cake pops haven’t occurred to me before – bite size pieces of cake on a lollipop stick decorated to suit any occasion – but I did give mine a bit of a twist. The Bakerella Cake Pops are truly works of art – it would break my heart to eat one! So I started with a simple version I couldn’t really stuff up, and maybe I’ll graduate to characters for Lil C’s 3rd birthday!
First, I made the RetroMummy Rumball mixture, with a teeny splash of Grand Marnier instead of Cointreau or rum. I also used a store-bought fruit cake instead of madeira cake for extra festive flavour. I let that sit for a while in the fridge to harden up, then used a melon-baller to scoop out litle balls of yumminess. This got old quite quickly and I ended up reverting to the spoon and hand-rolling method, but if the mixture was hard enough, the melon baller would work.
When you have a plate full of little balls of cake mix, put your lollipop sticks (or bamboo skewers or popsicle sticks would also work depending on the size of your cake balls) into the little balls, then put them in the freezer. THIS IS VERY IMPORTANT. You must have put the sticks in before you put them in the freezer, otherwise they will fall out during the coating process. I learned this the hard way.
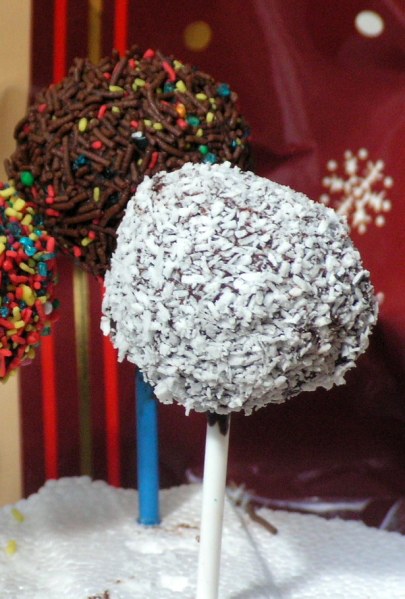
Leave them for about an hour (you can keep rolling more cake balls while your waiting if you have the freezer space). When you’re sure the mixture is firm enough and the sticks are wedged in tight, melt some dark chocolate (or milk or white if you would prefer) in a bowl. I added a little dribble of vegetable oil to make it shiny and thin enough to work with. Gather your decorating materials now too – I used coloured sugar crystals, chocolate flakes, hundreds and thousands and the perennial christmas favourite, coconut. Put each of your decorating things into separate bowls and line them all up on your kitchen bench.
NOW you can get your bare cake pops out of the freezer. Dip them into the chocolate mixture (holding on gently to the lollipop stick), using a spoon to coat the area closest to the stick. Hold it up and let the excess chocolate drip off, or smooth it out with your spoon if it’s too thick. Quickly transfer your chocolate truffle to one of the decorating bowls, and coat the cake pop in delightful coloured christmassy goodness.
Ooh, I forgot, you also need to have found some styrofoam to stand your cake pops in while they set. This was harder than I thought, as we did a big cleanout of our styrofoam earlier in the year. Luckily the packaging from my new sewing machine was still sitting in the studio (and lord help me if I ever need to post that somewhere for repairs).
When your cake pops are coated in chocolate and decorations, stand them up in the styrofoam. I found it useful to ‘pre-pierce’ a hole with a sharp bamboo skewer as the blunt end of the lollipop stick wasn’t very nimble and my truffles fell off a few sticks while trying to get them to stand up. (Another reason they need to be frozen.) The chocloated coated pops will set in just a few minutes in normal weather.
Repeat this process until you’ve run out of lollipop sticks or cake balls (or make some standard truffles or rumballs without the sticks to use up your mixture like I did).
Bon appetit! The rumball mixture is so soft and gooey when you bite through the chocolate coating. I was most impressed with myself on this ‘hacker’ recipe. Even Lil C approved.
These lovely little treats are going with Miss C for her daycare class and carers, and a batch is also coming to work with me for our festive lunch.

girl party inspiration


baby burps


A dear friend from my university days had her baby shower today. She loves handmade, so of course, I was overjoyed to be able to create something practical and special for her bub.
Since we don't know if it's a boy or girl, I went with functional and funky burp cloths and some embellished singlets - something a new mum can never have enough of!

excuse you!


The burp cloths are pretty easy - it's from a tutorial on the Cloud 9 fabrics blog, if you'd like to have a go yourself!

mental health food


evil M&M caramel slice....

 just one square will blow your diet for the week


Ingredients:
BASE:
1 cup hazelnut meal (or almond meal)
1/2 cup rice flour
1/2 cup brown sugar9 (or 1/3 cup caster sugar)
1/2 teaspoon baking powder; 1/2 teaspoon bicarb soda
100g butter (melted)
1 tablespoon of vanilla essence
CARAMEL LAYER
1 can condensed milk
125g butter
1/4 cup brown sugar
optional:1  tablespoon of vanilla essence, golden syrup or maple syrup
CHOCOLATE TOPPING
1 block of good quality cooking chocolate (dark is best, but milk also works well)
2 tablespoons of vegetable oil
1 medium size bag of MMs (plus more for snacking), or any other delicious crunchy chocolate or candy topping you fancy.


METHOD
Preheat the oven to 180 degrees celcius (160 for fan-forced ovens). Prepare a slice pad or two loaf pans with baking paper, ensuring the paper also lines the 'long' sides of the tins.
Measure out all all dry ingredients for the base, and place in a bowl. Give a quick whisk to mix the raising agents with the flours. Melt the butter and pour into the bowl. Add the vanilla essence. Mix until it forms a loose dough. Tip the dough into your baking tray (or trays), firmly pressing it down until it forms a 'crust' across the entire base of the tray. Place trays in the pre-heated oven for 10-15mins, until the base starts to turn golden brown. (NOTE: the base will puff up during baking, then sink again as it cools. Don't panic!)
Allow the base to cool completely, leaving them in the tins, then prepare the caramel.
Melt butter and sugar in a small saucepan over low heat. When the sugar and butter have formed a slick sauce-like consistency, add the condensed milk, stir till it is all blended through, making sure it never gets too hot. If your mix starts forming bubbles, it's too hot! Add the additional flavouring syrup now, if desired. The entire melting / caramel cooking process should take less than 5 minutes, and NEVER take your eyes off it. Take the pan off the stove and allow the mix to cool slightly, then poor over your base. Make sure your spread it into all corners. (NOTE: you cannot do this step in the microwave, it will explode and go everywhere... you've been warned). Put the caaramel/base layers back in the oven for another 10 minutes, until the caramel is just starting to firm up. Leave to cool again, you can put it in the fridge at this point to speed things up if you wish.
Make the chocolate layer - again, this will work better in a saucepan, because of the oil content. Break the chocolate into small pieces and put in the saucepan over a low heat (preferably using a double boiler technique). Stir the chocolate until it is melted, then add the vege oil and stir again until all combined. Your chocolate should be lovely and shiny, and quite thin in consistency. Pour the chocolate layer over the cooled caramel/base, again ensuring it reaches to all corners. BEFORE the chocolate starts to set, tip (whatever is left of) your bag on M&Ms onto the chocolate, sprinkling evenly. Some will sink into the chocolate, that's okay!
Put the whole slice back into a fridge / cool space while the chocolate sets (at least an hour).
Heat up a large knife, and slice that baby up into 24 small squares... then indulge in your magnificent creation!!!!