Saturday 22 September 2012

$100 Party Project - decorate and eat

Need to catch up on the $100 Party Project? Here's the first few steps you may have missed:
1. Introduction
2. Planning
3. Venue and Invitations

Theming is a very important aspect of your party and it can have a big impact on your budget.

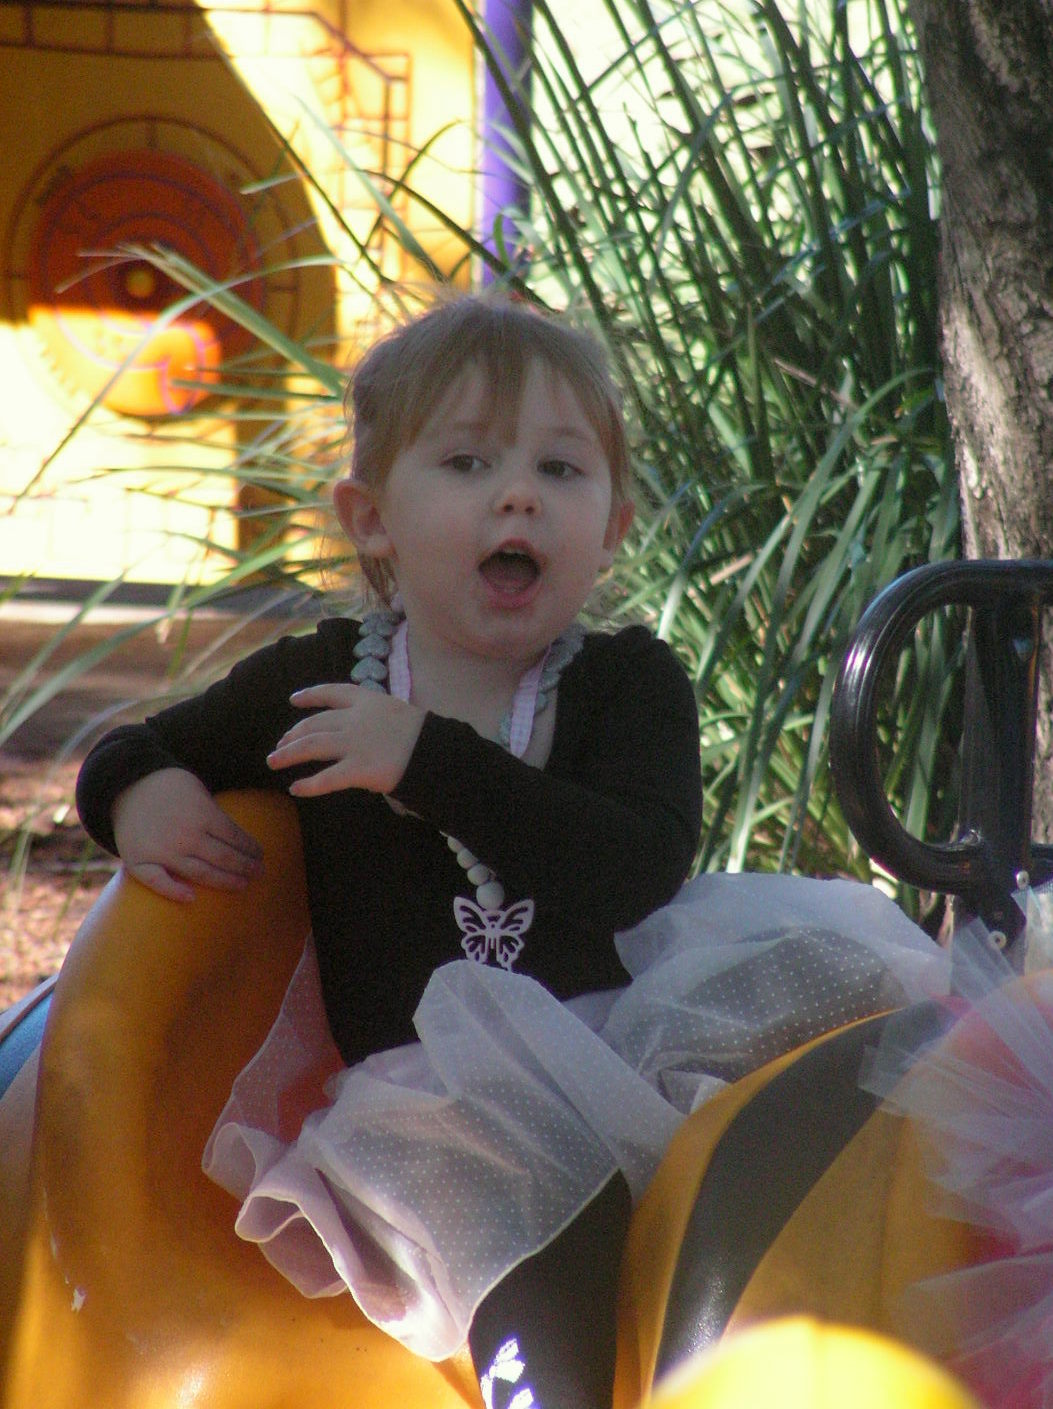
There are literally thousands of options, though you can be assured the younger the child, the wilder and more complicated their theme request will be! So far, in our short birthday party lives, we've had a Littlest Pet Shop party, a Garden party, a Ballerina party and Ponies and Princesses party. We've also sprung for a High Tea Sweet Sixteen and a Laserforce 13th.... but those last two options were definitely not befitting a shoestring budget.


1st birthday Garden Party food
So while it may drive you mad, it's important to discuss with your special birthday person what type of party they would like to have, EARLY. Or, you can make the decision for them. Regardless, the $100 Party Project requires planning, forethought and lots of DIY - so give yourself at least 6 weeks to get organised.

"I hate DIY", I hear you groan. Not everyone wants to be Martha Stewart (though she does give mums all over the world something to aspire to, notwithstanding financial advice). But actually, Martha's website is an awesome place to start researching party decorations. So is Pinterest, Facebook and your new best friend - Google. Just type your theme and the keyword birthday into that search bar and watch the thousands of results cascade down your page. It would be a very unique party theme indeed that some clever person hadn't already put some inspiration on the wide world of interwebs.


Hiring a character cake tin is
a great way to cut costs
Menu planning is just as simple - you can go with party staples on a themed table display, or you can match your food items to your theme - start with Google, Pinterest and Facebook. One thing you will want to spend some time thinking about, researching and perhaps even practicing is the Birthday Cake. Yes. The $100 party project requires you to bake your own cake, or outsource it to those handy party minions you've previously recruited.


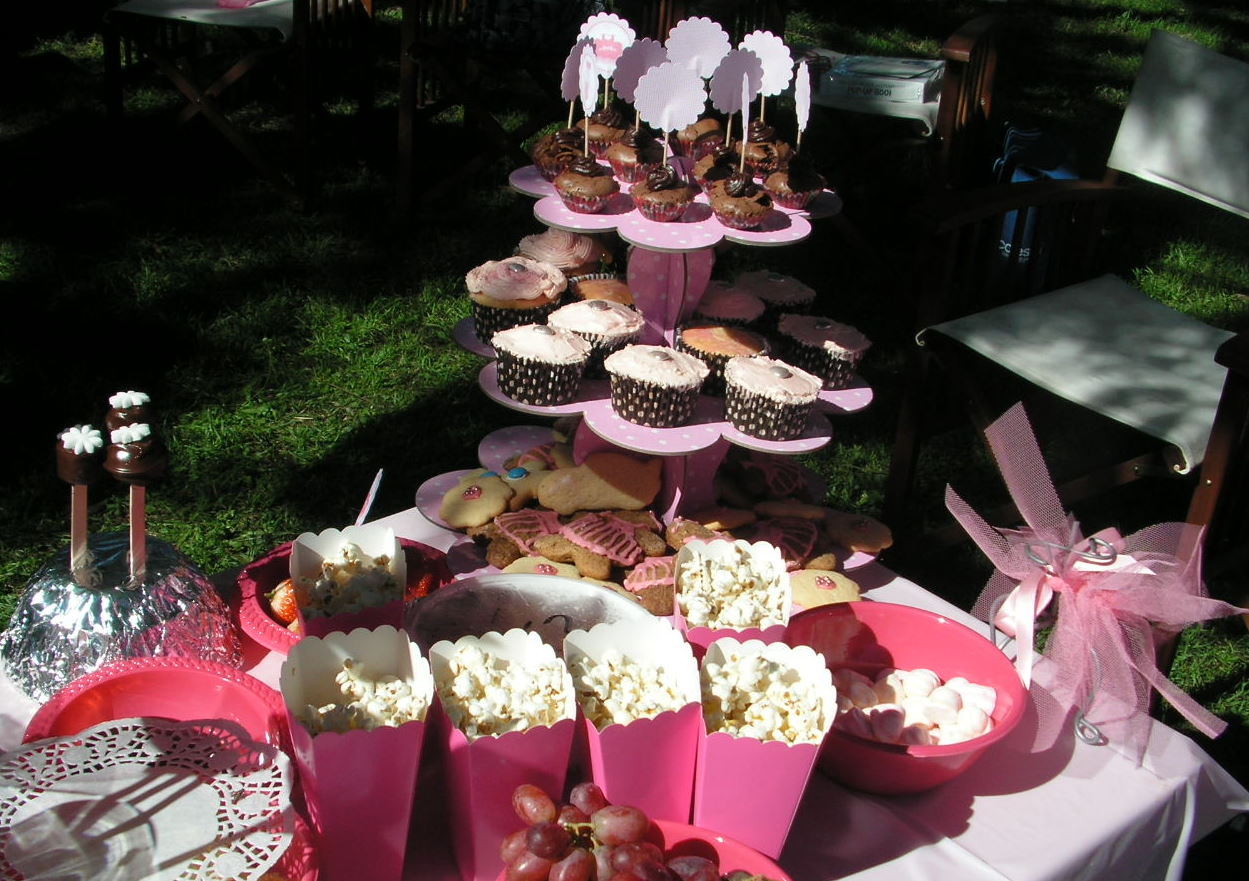
Ballerina Party Food
Once you have a plethora of party paraphernalia pinned, picked or planned, your must CULL. I have learned this the hard way. No matter how wonderfully planned you are, and how magnificent the party will be in your head, SOMETHING will inevitably go wrong. So, minimise your risk. I recommend following The Rule of Five.

The Rule of Five requires you to cut down your wishlist of food and decorations to just 5 items each. This means you bake/buy/plate five different foods:
1. savoury
2. sweet
3. sandwich
4. fruit
5. and one extra cute / wow food item. This MAY be your birthday cake if you're not having a large number of guests.


Bunting made from scrapbook paper and waxed thread.

Then you apply the same principle to Decorations. You can make/buy/assemble five different decor items, for example:
1. table cloth
2. streamers, bunting or balloons
3. table centrepiece
4. food/place cards
5. themed food decorations eg. cake toppers or cute cups/plates/serviettes.


Allow yourself some breathing space. If you get to the day before the party and everything has gone swimmingly, THEN you can attempt a sixth, seventh or eigth item. But more likely, you'll be accepting all offers from family and friends to bring a plate or special tray, esky or drink dispenser just to get an extra 30 minutes back on your day. And that's okay. That's what friends are for!

Cupcake toppers are easy - print your theme
images or characters from the internet
the stick to a paddle pop and voila!
What if I run out of food! I hear your ask, panicked. You won't. I've been to dozens of parties, and I've never seen a completely decimated food table at the end of the celebrations. Kids will grab a handful of m&ms or marshmallows, cram them into their mouths and then go running screaming around the backyard for another 10 minutes before they need to refuel. Inevitable the lollies and sweet food will go first (the icing off the cupcakes goes first, then you find dozens of marooned cake bases crumbling in their wrappers all through the garden where they've been haphazardly tossed during a game of tag), so perhaps consider staggering your food drop - put out the savoury (pizza, sausage rolls, party pies, crackers etc) first, then bring the sweet food out 30 minutes later. If your party goes for more than an hour that's still plenty of time for the kids to run off the sugar high they'll be accumulating.

I have been at parties where they've run out of drinks though - so make sure you have enough poppers / water bottles / litres of punch for at least three drinks each. As a cost saving measure, ask friends if they have a large cooler you can borrow, to fill with iced water or cordial. Some local fast food outlets also have branded kegs you can hire for a small fee (plus safety deposit) if you have no luck with your circle of friends.

So, back to that DIY part. Now that you've narrowed down your part decorations to 5 things that are the essence of your theme, you'll probably have to buy supplies to make / assemble them. There are hundreds of free tutorials on the internet for making amazing decorations. There are also some pretty awesome finds in your local Reject Shop (Things, The Warehouse, Crazy Clarks). Never be ashamed to shop for party items in those shops! Unless your children are lemmings, it's unlikely you'll be throwing the same themed party twice, so it's okay to buy cheap stuff with the intention of breaking it on the day, or tossing it in the bin.

Speaking of breaking it on the day, my clever friend even made her own Pinata! She tells me it was a long process, but her son got a huge kick out of making it with her, and it allows you to custom make your pinata to your theme - Spotlight and clearance stores are usually overflowing with Dora and Thomas, but not so much on the Octonauts....or pigs.

So, are you inspired? Start with the Bloombub Party Ideas pinterest board, and go from there. We've got lots of decorations, table settings, cute food and drink options pinned to whet your appetite.

Do you have a tried and true party menu or decoration idea to share? Post your links or descriptions below!

Friday 14 September 2012

Put your Pinterest to good use!

I've decided to use my Pinning Powers to get my Christmas party / gifts / crafts SORTED early this year, and have created a Handmade Christmas board.


Maxi-Patch skirt from the Bloombub Christmas Collection.
Available at our etsy store soon

 Do you pin? Leave your links here for me to follow!

Tuesday 11 September 2012

$100 Party Project - venue and invitations

So - you've mapped out your party plan, know what your theme is and how many children you're going to invite. Now comes one of the hardest (and potentially most expensive) parts of the party decision making process - where to have it! 

The cheapest and most practical place to host a party is a home. But that isn't always possible, especially if you live in a small unit, have no yard, or want to invite more people than will fit in your house! 

A nearby park is the next most popular option. It provides free entertainment in the form of playground equipment, lost of space for children hyped up on sugar to run-around, and it's easier for parking. 
Party in the park = free activities!
However, not all parks have toilet facilities (a must for pre-school and primary aged kids), there is often competition for the picnic facilities with other parties (not all dads are willing to stake out the rotundas at 6am), and you'll need a wet weather backup plan. Plus you need to cart all your food, decorations and serving ware to the park and home again - which can be a logistical nightmare. 


So what other options are there? For the purposes of our challenge, we need to identify a free venue. It's unlikely you'll find a playhouse or dedicated party venue for less than $15 per head (unless it's the local fast food joint).

My suggestion - a family member or close friend's house with a big yard (and if it's summer, a pool! There will be an indoor option, easy clean-up, a kitchen / fridge / toilet and you can call for extra adult support to wrangle the kids.
 

So, once you've conned convinced your nearest and dearest to help with your party, you'll need to send out some invitations! 

You could buy a pad of ten from the local newsagent. That would be supporting a local business. OR you could buy a custom designed piece of themed magnificence from a wonderfully creative person on etsy, and print them on your home computer. Some of my favourite sellers offer complete print-at-home party packages including decorations for less than $30, and you can definitely get a set of invitations for less than $10. Have a browse - you'll be surprised how many beautiful options you have. 

You could also make your own - some craft paper, character/pretty stickers and a wrapping-paper envelope is all you need to make a pretty clever invitation. Of course, you'll need some time to do this, and you may want to consider the age of the child you're inviting, as I'm pretty sure I went to way to much trouble with my flocked-paper ballerina invitations last year for Miss C's 3rd birthday. Those enveloped got ripped in less than 10 seconds, and the kids were more interested in the glitter side of the cardboard than the side with all the details on it. Never mind.....


Make sure you give a good lead time with your invitations - no less than 2 weeks, especially if you are inviting children from daycare or kindy, who many not attend everyday to collect their invitation.

Plus, the longer you have to collect RSVPs, the longer you have to construct your menu and decorations! Which is the next installment in our party challenge!

Tuesday 4 September 2012

$100 Party Project - Stick to the Plan!

Are you ready to plan an awesome party for less than $100?

Great! Let's get started.

As a project manager and self-confessed bossy-boots-perfectionist, I love nothing better than a good to-do list. Birthday parties require a few more than one list though - so here's what I use to keep all those essential details in one handy spot - the Party Project Plan.

Don't laugh. You'll never turn back once you've used it.

It collates everything you need to create shopping lists, track RSVPs, and MOST IMPORTANTLY delegate tasks. For that is the next hot tip for planning a birthday party on a budget - call in favours, accept help when it's offered, and if it's not offered, just ask your sister/best friend/mum to do it for you. 
Accept ALL offers of help... no matter how small.

You can delegate anything and everything. Think of all your friends, what they are best at. Know a great cook? Ask them to make cupcakes or cookies. Know someone crafty? They can make you some bunting or special paper decorations. Handyman? He can knock up a cute table or set of serving boxes for all your delicious snacks. A great artist? Facepainter! Got a funny relative - turn them into the entertainment.

Then think of those other mums & dads you've helped out this year... does anyone owe you a favour? Maybe they can pick up the ice, bring an esky, lend you a tablecloth. Whatever you want/need - don't be afraid to ask someone else to help. Maybe you just need someone to arrive a bit early and help put the food on the table or blow up some balloons. When it comes to birthday parties, most of your friends and family will be only too happy to help.

So - get cracking, start filling out that plan. Decide on a theme, and next, we'll tackle the venue and invitations!


"Puh-leeeeeaaaaase?"
If all else fails... send for cute "beggar-reinforcements".

Monday 3 September 2012

The $100 Birthday Party - it's possible!

Birthday parties are a big deal. For both mum and the celebrating child. I've heard the stories about extravagant parties for toddlers and tweens that cost upwards of $1000. Yeesh. My wedding dress and bridesmaids dresses combined cost less than that. 

I've heard stories about mums descending into despair about imperfect birthday cakes, and doing injuries trying to throw a fabulous party for their child. In fact, some of those horror stories are mine. Let's not talk about this year's party where I took two weeks off to plan and prepare, it rained all week, and I ended up horribly sick the entire time. Ooops, I digress.


But I'm learning from experience, and I'm here to tell you that you CAN throw an AMAZING birthday party for your child, for  $100. Yes you can. It's true.

Over the next few weeks, I'll go into detail on each area of the party-planning process, and my top tips for keeping costs down. But for now, there is just one thing you need to know:

It is not ridiculous to have a party planning spreadsheet.
Be prepared.

In fact, tomorrow, I'm going to share mine with you. Strap in readers - it's gonna be wild!


Saturday 1 September 2012

Happy fathers day!

Sunday means pancake breakfast in our house, but today we went a luttle bit creative with our shapes!


Friday 31 August 2012

rumball-truffle-cake-pops


Inspired by two of my favourite blogs, RetroMummy and Bakerella, I embarked on a Cake Pop mission today. I don’t know why cake pops haven’t occurred to me before – bite size pieces of cake on a lollipop stick decorated to suit any occasion – but I did give mine a bit of a twist. The Bakerella Cake Pops are truly works of art – it would break my heart to eat one! So I started with a simple version I couldn’t really stuff up, and maybe I’ll graduate to characters for Lil C’s 3rd birthday!
First, I made the RetroMummy Rumball mixture, with a teeny splash of Grand Marnier instead of Cointreau or rum. I also used a store-bought fruit cake instead of madeira cake for extra festive flavour. I let that sit for a while in the fridge to harden up, then used a melon-baller to scoop out litle balls of yumminess. This got old quite quickly and I ended up reverting to the spoon and hand-rolling method, but if the mixture was hard enough, the melon baller would work.
When you have a plate full of little balls of cake mix, put your lollipop sticks (or bamboo skewers or popsicle sticks would also work depending on the size of your cake balls) into the little balls, then put them in the freezer. THIS IS VERY IMPORTANT. You must have put the sticks in before you put them in the freezer, otherwise they will fall out during the coating process. I learned this the hard way.
Leave them for about an hour (you can keep rolling more cake balls while your waiting if you have the freezer space). When you’re sure the mixture is firm enough and the sticks are wedged in tight, melt some dark chocolate (or milk or white if you would prefer) in a bowl. I added a little dribble of vegetable oil to make it shiny and thin enough to work with. Gather your decorating materials now too – I used coloured sugar crystals, chocolate flakes, hundreds and thousands and the perennial christmas favourite, coconut. Put each of your decorating things into separate bowls and line them all up on your kitchen bench.
NOW you can get your bare cake pops out of the freezer. Dip them into the chocolate mixture (holding on gently to the lollipop stick), using a spoon to coat the area closest to the stick. Hold it up and let the excess chocolate drip off, or smooth it out with your spoon if it’s too thick. Quickly transfer your chocolate truffle to one of the decorating bowls, and coat the cake pop in delightful coloured christmassy goodness.
Ooh, I forgot, you also need to have found some styrofoam to stand your cake pops in while they set. This was harder than I thought, as we did a big cleanout of our styrofoam earlier in the year. Luckily the packaging from my new sewing machine was still sitting in the studio (and lord help me if I ever need to post that somewhere for repairs).
When your cake pops are coated in chocolate and decorations, stand them up in the styrofoam. I found it useful to ‘pre-pierce’ a hole with a sharp bamboo skewer as the blunt end of the lollipop stick wasn’t very nimble and my truffles fell off a few sticks while trying to get them to stand up. (Another reason they need to be frozen.) The chocloated coated pops will set in just a few minutes in normal weather.
Repeat this process until you’ve run out of lollipop sticks or cake balls (or make some standard truffles or rumballs without the sticks to use up your mixture like I did).
Bon appetit! The rumball mixture is so soft and gooey when you bite through the chocolate coating. I was most impressed with myself on this ‘hacker’ recipe. Even Lil C approved.
These lovely little treats are going with Miss C for her daycare class and carers, and a batch is also coming to work with me for our festive lunch.

girl party inspiration


baby burps


A dear friend from my university days had her baby shower today. She loves handmade, so of course, I was overjoyed to be able to create something practical and special for her bub.
Since we don't know if it's a boy or girl, I went with functional and funky burp cloths and some embellished singlets - something a new mum can never have enough of!

excuse you!


The burp cloths are pretty easy - it's from a tutorial on the Cloud 9 fabrics blog, if you'd like to have a go yourself!

mental health food


evil M&M caramel slice....

 just one square will blow your diet for the week


Ingredients:
BASE:
1 cup hazelnut meal (or almond meal)
1/2 cup rice flour
1/2 cup brown sugar9 (or 1/3 cup caster sugar)
1/2 teaspoon baking powder; 1/2 teaspoon bicarb soda
100g butter (melted)
1 tablespoon of vanilla essence
CARAMEL LAYER
1 can condensed milk
125g butter
1/4 cup brown sugar
optional:1  tablespoon of vanilla essence, golden syrup or maple syrup
CHOCOLATE TOPPING
1 block of good quality cooking chocolate (dark is best, but milk also works well)
2 tablespoons of vegetable oil
1 medium size bag of MMs (plus more for snacking), or any other delicious crunchy chocolate or candy topping you fancy.


METHOD
Preheat the oven to 180 degrees celcius (160 for fan-forced ovens). Prepare a slice pad or two loaf pans with baking paper, ensuring the paper also lines the 'long' sides of the tins.
Measure out all all dry ingredients for the base, and place in a bowl. Give a quick whisk to mix the raising agents with the flours. Melt the butter and pour into the bowl. Add the vanilla essence. Mix until it forms a loose dough. Tip the dough into your baking tray (or trays), firmly pressing it down until it forms a 'crust' across the entire base of the tray. Place trays in the pre-heated oven for 10-15mins, until the base starts to turn golden brown. (NOTE: the base will puff up during baking, then sink again as it cools. Don't panic!)
Allow the base to cool completely, leaving them in the tins, then prepare the caramel.
Melt butter and sugar in a small saucepan over low heat. When the sugar and butter have formed a slick sauce-like consistency, add the condensed milk, stir till it is all blended through, making sure it never gets too hot. If your mix starts forming bubbles, it's too hot! Add the additional flavouring syrup now, if desired. The entire melting / caramel cooking process should take less than 5 minutes, and NEVER take your eyes off it. Take the pan off the stove and allow the mix to cool slightly, then poor over your base. Make sure your spread it into all corners. (NOTE: you cannot do this step in the microwave, it will explode and go everywhere... you've been warned). Put the caaramel/base layers back in the oven for another 10 minutes, until the caramel is just starting to firm up. Leave to cool again, you can put it in the fridge at this point to speed things up if you wish.
Make the chocolate layer - again, this will work better in a saucepan, because of the oil content. Break the chocolate into small pieces and put in the saucepan over a low heat (preferably using a double boiler technique). Stir the chocolate until it is melted, then add the vege oil and stir again until all combined. Your chocolate should be lovely and shiny, and quite thin in consistency. Pour the chocolate layer over the cooled caramel/base, again ensuring it reaches to all corners. BEFORE the chocolate starts to set, tip (whatever is left of) your bag on M&Ms onto the chocolate, sprinkling evenly. Some will sink into the chocolate, that's okay!
Put the whole slice back into a fridge / cool space while the chocolate sets (at least an hour).
Heat up a large knife, and slice that baby up into 24 small squares... then indulge in your magnificent creation!!!!